


Contemplating coverage?
Subscribe to receive our emails & get
$200 OFF!
Have questions?
Call us: (833) 544-8273

Expert-Reviewed Content: Guided by Editorial Standards

Written By Clint Bird
Yes: a small amount of condensation in your fridge is normal, especially on the back wall or during the defrost cycle. It becomes a problem when moisture pools on shelves, soaks food, or persists after the door has been closed for several hours. That typically signals a door seal, temperature, or drainage issue.
Normal condensation clears on its own. Abnormal condensation keeps coming back no matter how often you wipe it down.

If you have noticed water droplets or moisture on your shelves, food, or fridge walls, the cause usually falls into one of these categories:
Here is what each one looks like in practice.
High humidity in your kitchen is one of the most common triggers for fridge sweating, and it gets worse in summer. When humid air enters the fridge every time you open the door, it meets cold interior surfaces and releases moisture.
Placement matters too. According to Frigidaire, positioning a refrigerator near an oven, dishwasher, or a sunny window raises the ambient heat around the appliance, making condensation more likely. If your kitchen layout puts the fridge next to one of these heat sources, that may be contributing to the problem. High indoor humidity also affects other appliances: air conditioner moisture problems are often driven by the same root cause.
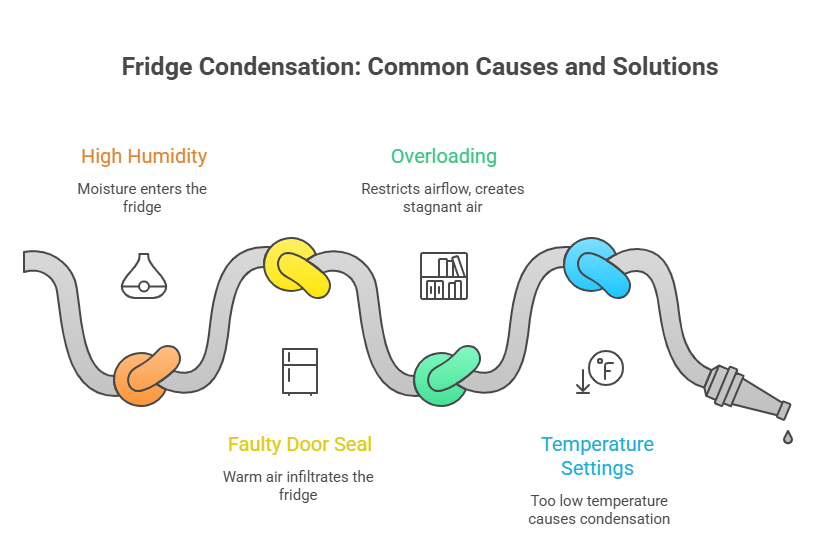
A damaged or worn door gasket lets warm, humid air seep in continuously, even when the door is fully closed. According to the U.S. Department of Energy, loose door gaskets cause excess frost and condensation and force the compressor to work harder, raising your energy bill as a result.
To test your door seal, try the dollar bill test: close a dollar bill in the door and try to pull it out. If it slides out without resistance, your seal needs replacing or adjustment. Replace the door gasket if it fails this test.
An overcrowded fridge restricts airflow, creating warm spots where condensation forms. According to LG, uncovered food or liquids add significant humidity inside the fridge, and moisture on glass shelves often means items are uncovered or loosely wrapped. Pack the fridge with room to breathe and keep containers covered.
If the temperature is set too high, the interior air stays warm enough to hold moisture without releasing it until it hits a cold surface. If it is set too low, the fridge overcorrects and creates ice and frost. The ideal range is 35 to 38 degrees F.
The USDA Food Safety and Inspection Service states that refrigerators should be kept at 40 degrees F or below to prevent bacterial growth and recommends using an appliance thermometer to verify actual internal temperature (USDA FSIS). An appliance thermometer costs a few dollars and is far more accurate than the dial setting.
Putting hot or warm food directly into the refrigerator introduces a burst of warm, moisture-laden air to the cold interior. According to GE Appliances, this is a direct cause of interior condensation. Let hot foods cool to near room temperature before refrigerating to reduce moisture buildup. This single habit change makes a measurable difference.
Follow these steps in order. Most condensation problems resolve after step one or two.
Wipe the gasket down with warm, soapy water and dry it completely. Check for cracks, tears, or flattened sections. If it fails the dollar bill test, order a replacement gasket for your model. Most are clip-on or screw-mounted and can be replaced in under 30 minutes.
Set the refrigerator compartment to 37 degrees F, as recommended by Iowa State University Extension. Confirm with an appliance thermometer placed on a middle shelf.
Locate the vents inside the fridge (usually on the back wall) and make sure no food, boxes, or bags are pressed against them. Leave at least an inch of clearance around items on each shelf.
Safety first: unplug the fridge before working on the drain.
Locate the drain hole at the back of the refrigerator compartment (usually near the bottom). Insert a pipe cleaner or thin wire to clear any debris. Flush with a 50/50 warm water and white vinegar solution to prevent mold. You can also clean your fridge ice maker and water dispenser during the same maintenance session. Repeat every three to six months.
Run your range hood or kitchen exhaust fan while cooking. If your kitchen humidity stays high, a plug-in dehumidifier can make a significant difference. One more thing worth knowing: according to ENERGY STAR, anti-sweat switches power small heaters around fridge door frames. Turning them off saves a small amount of energy but can increase door condensation in humid climates.
Set hot dishes on the counter until they stop steaming, usually 20 to 30 minutes. Do not leave perishables out longer than two hours, per USDA guidelines.
Use airtight lids or plastic wrap on every container before refrigerating. This is the simplest habit change that reduces interior humidity fastest.
Condensation forms when warm air contacts a cold surface. The air cools, loses its ability to hold moisture, and releases water droplets. Inside a refrigerator, this happens when the interior temperature drops below the dew point of the air that entered when the door was opened.
The dew point is the temperature at which air becomes fully saturated and releases moisture. The higher the kitchen humidity, the higher the dew point, and the more likely condensation is to form on fridge surfaces.
Iowa State University Extension recommends 37 degrees F for the refrigerator compartment and 0 degrees F for the freezer as optimal settings for both food safety and appliance efficiency. Keeping the fridge in this range minimizes condensation without compromising food safety.
Humidity inside the fridge compounds the problem. The more moisture already in the air inside the compartment, the less additional humidity is needed to trigger condensation.
Where moisture appears tells you a lot about the cause.
Droplets on the back wall immediately after opening the door are almost always normal. Cold refrigerant lines run close to the back wall, making it the coldest surface in the compartment. According to Bosch, these droplets can freeze and thaw repeatedly during the automatic defrost cycle, draining to a tray above the compressor. If the back wall is wet constantly and you see ice buildup, that points to a defrost system issue.
Vegetable drawers are designed to hold higher humidity than the rest of the fridge, so some moisture is expected. Excessive condensation in the crisper drawer usually means produce is releasing gases and moisture that have nowhere to go. Make sure drawer vents (if present) are not blocked by overpacking.
Condensation inside sealed food containers typically forms when warm food was stored without cooling first, or when containers are moved from the fridge to a warm environment and then back. For containers, the fix is simple: cool food completely before storing and use lids that seal tightly. If moisture is forming inside containers during storage, check that your fridge temperature is not fluctuating by verifying it with an appliance thermometer.
Door condensation usually means the gasket is not sealing fully, or the fridge is not level. If the door tilts outward slightly, it will not close with enough pressure to compress the gasket. Samsung notes that a refrigerator should tilt slightly backward so the doors close and water drains correctly. Adjust the leveling feet until the fridge has a slight backward lean, then retest the door seal.
Freezer condensation during the defrost cycle is normal and disappears within an hour. Persistent moisture or ice buildup usually means a damaged door gasket is letting warm air in, or the defrost system is malfunctioning. Test the gasket for gaps and check that the freezer door closes completely.
According to Bosch, back-wall droplets in the freezer can freeze and then thaw during automatic defrost, draining to a collection tray. If the defrost timer or defrost heater fails, the frost does not melt, ice builds up on the evaporator coils, and you will eventually notice reduced cooling alongside the moisture. This is a technician repair, not a DIY fix.
Most fridge condensation resolves with the steps above. Use this framework to decide whether you have a behavioral fix or a part failure.
Specific parts that require professional diagnosis and replacement: door gasket (if beyond DIY comfort),defrost timer, defrost heater, defrost drain assembly, evaporator fan motor, and compressor. Knowing the part name helps when describing the problem to a technician.
If your refrigerator is covered under a Liberty Home Guard plan, a failed mechanical component like a defrost timer or evaporator fan is exactly the type of repair your refrigerator warranty coverage is designed to cover. Understanding how long refrigerators last by brand can also help you decide whether repair or replacement makes more sense for your specific model.
There’s a reason Liberty Home Guard was rated the #1 Home Warranty Service by U.S. News and World Report for 2021, 2022, 2023, and 2024. Check out our services.The Best Home Warranty Service
A small amount of condensation in your fridge is normal, particularly on the back wall or during the defrost cycle. It becomes a problem when moisture pools on shelves, soaks food, or does not clear after the door has been closed for several hours. Persistent condensation signals a door seal, temperature, or drainage problem that needs attention.
Your fridge is wet inside most often because of a faulty door seal letting warm air in, a temperature set outside the 35 to 38 degree F range, or high kitchen humidity. Check that the door seal passes the dollar bill test, confirm your temperature is between 35 and 38 degrees F, and make sure nothing is blocking the interior air vents.
Unplug the fridge first. Locate the drain hole at the back of the refrigerator compartment near the bottom. Insert a pipe cleaner or thin wire to dislodge debris. Flush with a 50/50 warm water and white vinegar solution. Repeat every three to six months to prevent clogs. Plug the fridge back in when finished.
Freezer dripping during the automatic defrost cycle is normal and clears within an hour. If it persists, check the door gasket for gaps and confirm the freezer door seals completely. A damaged gasket or faulty defrost system (timer or heater) lets warm air in continuously, causing ongoing moisture and ice buildup that requires a technician.
When moisture covers multiple shelves and food items, the most likely cause is a failed door seal combined with high kitchen humidity. Run the dollar bill test on the gasket, check that the temperature is at 35 to 38 degrees F, and make sure all food containers are covered. If the problem persists after these fixes, the defrost drain may be clogged or the gasket needs replacement.
Yes. Persistent moisture creates conditions where mold spores can establish on shelves, drawers, and gaskets. Wipe down wet surfaces with a white vinegar solution and address the underlying cause (door seal, temperature, uncovered food) to prevent recurrence. If mold appears on the door gasket, clean it thoroughly or replace the gasket.
Stay Ahead of Potential
Home Mishaps!
Subscribe to our Liberty Home Guard Newsletter and gain access to exclusive content that ensures your peace of mind.

Subscribe to receive our emails & get
Have questions?
Call us: (833) 544-8273
