



Contemplating coverage?
Subscribe to receive our emails & get
$300 OFF!
Have questions?
Call us: (833) 544-8273

Expert-Reviewed Content: Guided by Editorial Standards

Written By Erin Easley
A modern television is really several devices at once: a display, a streaming computer, an audio hub, and a network client. When something goes wrong, the failure rarely announces which part broke. A black screen could be a dead outlet, a failed backlight, or an HDMI cable that quietly stopped passing a signal.
The good news is that most common TV problems resolve in under ten minutes without a technician. This guide walks through the ten issues that send people searching for help, in the order you should rule them out, and tells you exactly when the problem stops being a settings fix and becomes a repair. At the end, you will find what TV repair actually costs in 2026 and how home warranty TV coverage compares to a manufacturer warranty.
What you see | Most likely cause | First thing to try |
Nothing at all, no standby light | Power supply or outlet | Test the outlet, then unplug for 60 seconds |
Standby light on, screen black | Backlight or power board | Flashlight test (below) |
Sound plays, screen black | Backlight or panel | Flashlight test |
Black screen on one input only | Cable, port, or source device | Swap HDMI cable and port |
Blocky or frozen picture | Signal or bandwidth | Restart source, check connections |
Apps freeze or buffer | Network | Restart router and TV together |
Nothing responds to the remote | Remote or IR sensor | Use the buttons on the TV itself |
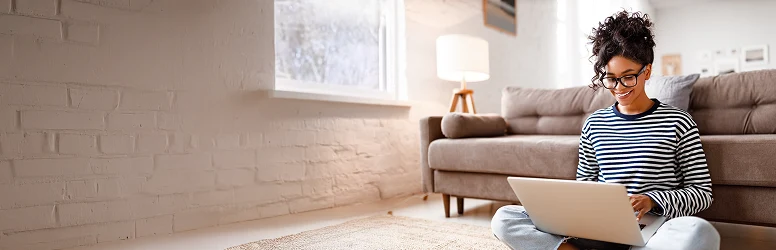
This is the single most searched TV failure, and it is usually not the TV.
When it is a repair: a blinking standby light with no image, a clicking sound on startup, or a faint burning smell all point to a failed power supply board. Stop there and call a technician.
Audio without video almost always means the panel is receiving the signal but not lighting it.
Run the flashlight test: turn the TV on, darken the room, and hold a bright flashlight at a sharp angle roughly two inches from the screen. Lean in and look for a faint image.
Confirm the problem appears on every input before you draw a conclusion. If it happens on only one, skip to the next section.
When one HDMI port goes dark but others work, the TV is usually fine.
Lip sync drift is a timing problem, not a hardware failure. Identify where it originates before changing any settings.
Most modern audio failures are HDMI-ARC or eARC handshake problems.
Pixelation is a signal problem, and the TV is almost never responsible.
Start with settings before assuming hardware.
When it is a repair: uniform dimming across every input and every picture mode, after a settings reset, points to degrading backlight LEDs.
These are the symptoms most likely to end in a replacement rather than a repair.
Before you get a quote, read section 12 on repair versus replacement. Panel-level damage rarely justifies the cost.
If you are dealing with a smart TV not connecting to WiFi, or apps that stall midway through a show, the network is the first place to look.
That oddly smooth, overly lifelike motion is motion smoothing, a feature working exactly as designed. The TV interpolates frames to simulate a higher framerate than the source provides, which looks fine on sports and distracting on film shot at 24 frames per second.
Turn it off in picture settings, where each manufacturer names it differently.
Brand | Motion smoothing is called | Where to look |
Samsung | Auto Motion Plus | Settings > Picture > Expert Settings |
LG | TruMotion | Settings > Picture > Advanced > Clarity |
Sony | Motionflow | Settings > Picture > Motion |
TCL | Action Smoothing | Settings > Picture > Advanced |
Hisense | Motion Enhancement | Settings > Picture > Advanced |
Vizio | Motion Control | Menu > Picture > More Picture |
Roku TV | Action Smoothing | Press * during playback > Picture Settings |
The working rule: replace rather than repair when the quote exceeds half the cost of a comparable new set.
Failed component | Typical repair range | Usually worth repairing? |
Backlight LED strips | $100 to $300 | Yes |
Power supply board | $175 to $400 | Yes |
Main board | $200 to $400 | Yes on larger or newer sets |
T-Con board | $200 to $400 | Usually |
HDMI port | $100 to $250 | Yes |
Panel or screen | $400 to $1,000+ | Almost never |
The panel accounts for most of a television’s manufacturing cost, which is why cracked screens and panel failures are effectively replacement events. Board-level failures are the opposite: a $250 power board repair on a two-year-old 75-inch set is straightforwardly worth doing.
Manufacturer warranty | Extended warranty | Home warranty electronics add-on | |
Covers | Factory defects | Defects and breakdowns | Breakdowns from normal wear and tear |
Typical length | 90 days to 1 year | Term you purchase | Renews with your contract |
Cracked screen | No | Sometimes | No |
Cost when you claim | Usually free, shipping may apply | Varies | Flat service call fee |
Covers TVs you already own | Only within the term | Rarely after purchase | Yes, if in working order |
Covers other devices | No | One device per plan | Multiple devices on one plan |
This is the distinction most people miss. A manufacturer warranty protects a new television for a short window against defects. Home warranty TV coverage protects televisions you already own against breakdowns from ordinary use, for as long as the contract is active. For a deeper comparison, see home warranty vs. manufacturer warranty.
Electronics Protection is an optional add-on to any Liberty Home Guard plan. A single add-on covers:
There is no inspection requirement, though covered items must be in working order when coverage begins. When something fails, an LHG-certified technician is dispatched to diagnose and resolve it, and you pay a service call fee rather than the full repair cost.
Because it attaches to an existing plan, the same contract that covers your refrigerator, HVAC, and plumbing also covers the television in the living room. You can review every option on the optional add-ons page or compare the three base plans on the plans and policies page.
TV troubleshooting solves most problems, but not the ones that involve a failed board. When a television needs actual repair and the manufacturer warranty has expired, the bill lands entirely on you.
Liberty Home Guard’s Electronics Protection add-on covers televisions, computers, printers, and home theater systems against breakdowns, alongside coverage for the appliances and systems in the rest of your home, all on one contract with one point of contact.
Get a free quote or call (866) 699-4589 to add Electronics Protection to your plan.
Replace rather than repair when the quote exceeds half the cost of a comparable new set. Panel and screen replacements almost always fail that test, because the panel accounts for most of a television's cost. Power boards, main boards, and backlight strips are usually worth fixing, especially on larger or newer sets where replacement runs well past the repair quote.
A home warranty covers televisions when you add electronics protection to your plan, and it applies to breakdowns from normal wear and tear rather than accidental damage or a cracked screen. Unlike a manufacturer warranty, which typically expires within a year, coverage renews with your contract and applies to sets you already own. You pay a service call fee per claim instead of the full repair cost.
Buffering is almost always a network issue, not a TV fault. Restart your router and TV together, then check signal strength in the network settings menu. Sets more than 20 feet from a router usually benefit from an Ethernet cable or a mesh node. If only one app misbehaves, delete and reinstall it, then install any pending firmware update.
Sound without picture usually points to the backlight or panel rather than your source device. Confirm it happens on every input first. Then run the flashlight test: hold a bright light close to the dark screen and look for a faint image. If you can see one, the backlight or power board has failed. No image at all suggests a main board or panel problem.
Start with the outlet: plug a lamp into it to confirm power. Then unplug the TV for 60 seconds and press the power button on the set itself, not the remote. If a standby light glows but the screen stays black, shine a flashlight at an angle across the screen. A faint image means the backlight has failed, which requires professional repair.
Stay Ahead of Potential
Home Mishaps!
Subscribe to our Liberty Home Guard Newsletter and gain access to exclusive content that ensures your peace of mind.

Subscribe to receive our emails & get
Have questions?
Call us: (833) 544-8273