


Contemplating coverage?
Subscribe to receive our emails & get
$200 OFF!
Have questions?
Call us: (833) 544-8273

Expert-Reviewed Content: Guided by Editorial Standards

Written By Angel Vallejo
There are few household problems as quietly maddening as a toilet that won’t stop running. The sound is relentless, the water bill climbs, and the fix always feels just out of reach. The truth is, a toilet keeps running for a reason — and that reason almost always comes down to a small mechanical issue inside the tank. According to the U.S. Environmental Protection Agency, a leaky or running toilet can waste up to 200 gallons of water per day, which adds up fast on your monthly bill. A toilet that runs constantly isn’t just annoying — it’s expensive. If you’ve been ignoring that constant trickle, check out our guide to save water and save money — the numbers might surprise you.

Here’s the good news: learning how to fix a running toilet is genuinely one of the easiest home repairs you can tackle. Most people complete the job in 30 to 45 minutes, and the parts cost just a few dollars at any hardware store. You don’t need a plumber, special tools, or any plumbing experience — just a little patience and this guide.
A toilet that won’t stop running typically traces back to one of three places inside the tank: the flapper and chain at the bottom, the fill tube that refills the tank after a flush, or the fill valve and float that control the water level. Each one has a distinct symptom and a straightforward fix. We’ll walk through all three in order, so you can work through them one by one until your toilet is quiet again.
Before you do anything else, find the water shut-off valve for your toilet. It’s usually a small oval knob on the wall or floor directly behind the toilet. Make sure it’s fully open — turned counterclockwise all the way. A partially closed valve can mimic the symptoms of a broken fill valve, sending you chasing a problem that doesn’t exist. Confirming the valve is open ensures you’re diagnosing from a clean baseline.
The flapper is the rubber stopper that sits over the drain hole at the bottom of your toilet tank. Every time you flush, it lifts to let water rush into the bowl, then drops back down to seal the tank so it can refill. The chain is the small metal or plastic link that connects the flapper to the flush handle lever. Together, they’re responsible for the most common cause of a toilet that won’t stop running.
Start by checking chain slack. Too much slack in the chain — more than about half an inch of loose play — means the chain can wriggle under the flapper as it closes. When that happens, the flapper can’t form a tight seal, and water trickles continuously from the tank into the bowl. To fix this, unhook the chain from its current clip position on the flush lever arm and move it to a hole closer to the handle. You want just a small amount of slack — enough that the flapper drops freely, but not so much that the chain has room to bunch up underneath it.
The opposite problem is a chain that’s pulled too tight. If there’s no slack at all, the chain holds the flapper slightly open at all times, which means the tank never fills completely and the fill valve keeps running trying to compensate. A good rule of thumb is about a half-inch of slack — the flapper should rest fully flat when the handle is down, and lift cleanly when you flush.
If adjusting the chain doesn’t solve the problem, take a closer look at the flapper itself. The rubber rim around the edge of the flapper creates the seal that keeps water in the tank. Over time, that rubber can warp, crack, or develop a chalky residue from mineral deposits — any of which breaks the seal. Run your finger along the rim of the flapper. If it feels rough, stiff, or uneven, replace it. Replacement flappers are universal and inexpensive, typically $5 to $10 at any hardware store. Turn off the water supply, flush to empty the tank, unhook the old flapper from the pegs on either side of the overflow tube, and snap the new one into place.
One more thing to check: the flush lever arm itself. If the handle feels sticky or stays depressed after you flush, the arm may have slipped on its mounting nut or developed a small crack. Tighten the mounting nut (note that it’s often reverse-threaded, so turn it clockwise to loosen) or replace the lever arm if it’s visibly damaged — it’s another inexpensive part.
The fill tube is a narrow, flexible hose that runs from the fill valve — the tall plastic tower inside your tank — down into the overflow tube, which is the open pipe standing up in the center of the tank. The fill tube’s job is to refill the bowl during a flush, separate from refilling the tank itself.
The problem occurs when the end of the fill tube slips below the waterline inside the overflow tube. This creates a siphon effect that slowly but continuously draws water down the drain, keeping the fill valve running long after the tank should have shut off. The fix is easy: pull the fill tube out of the overflow tube, trim it so it’s a bit shorter if needed, and clip or position the end so it sits at least an inch above the water level — never submerged.
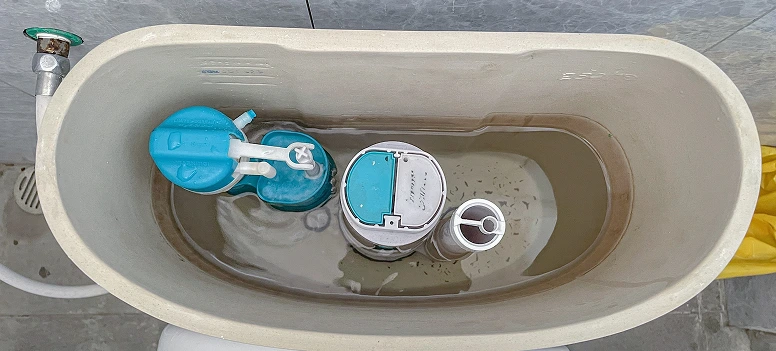
The fill valve and float work as a team. As your tank fills with water after a flush, the float — either a ball on an arm or a cylindrical cup that slides along the fill valve — rises with the water level. When the float reaches the right height, it signals the fill valve to shut off the water supply. If the float is set too high, water rises past the top of the overflow tube and drains away continuously, which is why the toilet tank won’t stop filling.
On older toilets with a ball float — the kind that looks like a rubber ball on the end of a metal rod — the fix is to gently bend the float arm downward. This lowers the point at which the float triggers the shutoff, which brings the water level down below the overflow tube. Some older models also have a small adjustment screw where the arm meets the fill valve body — turning it counterclockwise lowers the float setpoint without any bending required.
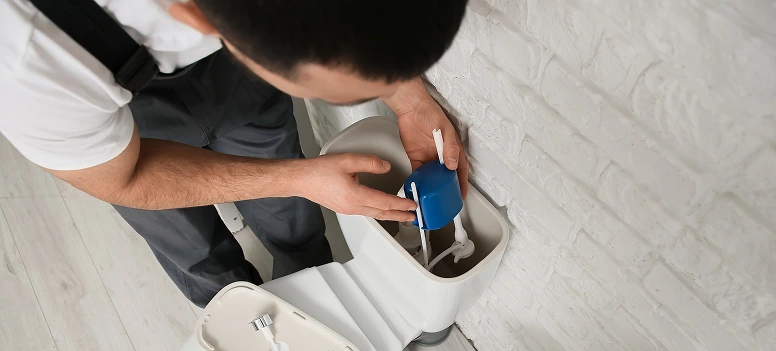
On newer toilets, the float is a plastic cup or cylinder that wraps around the fill valve shaft. To adjust it, find the adjustment screw on top of the fill valve (usually a slot for a flathead screwdriver) or look for a clip or pinch tab on the side of the float. Turning the screw counterclockwise, or sliding the float clip downward, lowers the target water level. The water surface should sit about an inch below the top of the overflow tube when the tank is full.
If you’ve adjusted the float and the toilet fill valve keeps running anyway, the valve itself may be worn out and ready for replacement. Here’s how to do a full fill valve swap:
If you’ve worked through all three steps and the toilet is still running, the issue might be deeper, possibly a backup further down the line. Check out our guide on what causes a toilet backup and how to fix it for your next troubleshooting steps.
You just worked through how to fix a running toilet from top to bottom — flapper, fill tube, float, and fill valve. None of it requires professional training, and the parts are cheap and widely available. It might take a bit of trial and error to land on which component is causing your specific problem, but once you find it, the fix takes minutes. The payoff is real: lower water bills, a quieter bathroom, and the satisfaction of having handled it yourself.
Now, here’s a question worth asking: does a home warranty cover plumbing? The answer is yes — a quality home warranty plan typically covers your plumbing systems, including toilets and supply lines, as well as heating and cooling systems, electrical systems, and major appliances. That means if a repair turns out to be bigger than a $10 flapper, you’re not stuck footing the full bill alone.
If you’ve been putting off getting coverage, this is a good moment to take a look at what’s available. Plans vary in cost and scope, so it’s worth comparing options to find one that fits your home and your budget.
Protect What’s Most Important With
Get A Free Quote
America’s #1 Home Warranty
Most toilets made in the last two decades use a cup or cylinder float that wraps directly around the fill valve shaft rather than a traditional ball-on-arm design. To adjust it, locate the adjustment screw on top of the fill valve or the adjustment clip on the float itself and move it downward to lower the water level. If you're unsure which type you have, look inside the tank — a ball float looks like a round rubber orb attached to a metal arm, while a cup float is a plastic sleeve sliding along the vertical fill valve body.
Start by checking the flapper seat — the plastic ring the flapper presses against — for cracks or mineral buildup that might prevent a good seal even with a new flapper installed. If you've replaced the flapper, fill tube, and fill valve and the toilet is still running, it may be time to call a licensed plumber, since the issue could involve a crack in the overflow tube or a structural problem inside the tank. An older toilet that has required multiple repairs in a short window might also be a candidate for full replacement rather than continued patchwork fixes.
The fastest way to stop a running toilet right now is to turn off the water supply valve located on the wall or floor directly behind the toilet — just turn it clockwise until it stops. This cuts off the flow of water into the tank entirely, which silences the running sound and stops the waste immediately. That's a temporary measure, not a fix, but it buys you time to gather parts and work through the steps above at your own pace.
Most toilet running fixes are remarkably affordable. A replacement flapper typically runs $5 to $15, and a new fill valve costs between $10 and $30 depending on the brand and your toilet model. If you hire a plumber, expect to pay anywhere from $100 to $300 or more for the same repair, plus a service call fee. For more ways to keep repair costs down, see our tips on saving money on small home repairs — DIY almost always wins on price.
Stay Ahead of Potential
Home Mishaps!
Subscribe to our Liberty Home Guard Newsletter and gain access to exclusive content that ensures your peace of mind.

Subscribe to receive our emails & get
Have questions?
Call us: (833) 544-8273
