Coupons & Promotions

Kenmore Dishwasher Not Draining

A Kenmore dishwasher that won't drain leaves an inch or more of cloudy water sitting in the bottom of the tub, and it usually happens at the worst possible moment. The good news is that in most cases the pump is fine and something in the drain path is blocking it — a packed filter, a kinked hose, a plugged garbage disposal port, or a blocked air gap.

Learn the most common reasons a Kenmore dishwasher stops draining, how to work through them in the order a technician would, and which repairs are worth handing off.


Liberty Home Guard members filed more than 300 Kenmore dishwasher claims in 2025, and drainage was one of the most common reasons for the call.

Extend the Life of Your Appliance

Find Your Solution Here!

Learn More

Key Reasons for the Problem:

%

62% of reported issues are the

Drain Pump or Pump Motor Failurequestion

%

22% of reported issues are the

Clogged or Kinked Drain Hosequestion

%

8% of reported issues are the

Blocked Air Gap or External Drain Linequestion

%

8% of reported issues are the

All Other Causesquestion

One Plan. Every Appliance. Zero Stress.

Extended warranties only cover one item. Liberty Home Guard protects all your appliances and systems under one simple plan.
If it breaks, we’ve got you covered—no matter the brand.

Get My Free Quote

Diagnostic and Troubleshooting Steps

When your Kenmore dishwasher is doesn't drain, certain adjustments and repairs are more commonly required than others. Below are the most frequent fixes:


Diagnostic & Troubleshooting
Force the Dishwasher to Drain

Step 1:

Force the Dishwasher to Drain
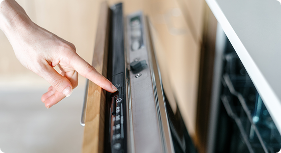
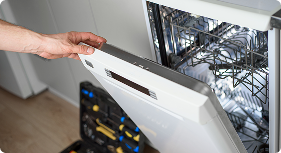
  • Close the door fully and press CANCEL/DRAIN — the door must be latched for the pump to run. The dishwasher pauses a few seconds, then runs a two-minute drain. When the Cancel/Drain light goes out, it's finished. If your model has no CANCEL/DRAIN button, start any cycle and cancel it, then let the cancel routine finish on its own. 
  • Do not remove the filter while water is still standing in the tub. Debris floating in that water drops straight into the pump and turns a ten-minute cleaning job into a pump replacement.
Clean the Filter or Hard Food Disposer
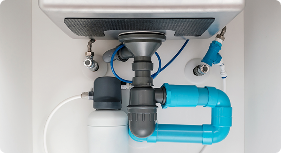
Step 2:

Clean the Filter or Hard Food Disposer

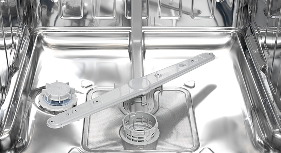
  • Remove the lower rack and look at the bottom of the tub. Kenmore built these two different ways. If you see a cylindrical mesh filter, twist it counterclockwise, lift it out with the flat coarse filter beneath it, and rinse both under warm water using a soft brush. 
  • If you see a flat plate with the spray arm mounted over it and nothing that twists, you have a hard food disposer with a chopper blade and no removable filter. Reaching the screen means removing the lower spray arm and cover. Either way, clear the sump — the recessed well under the filter — where glass chips, fruit stickers, and popcorn kernels collect and jam the pump impeller.
Run the Garbage Disposal and Check the Knockout Plug
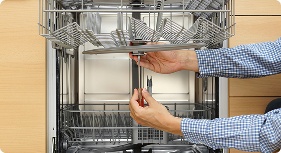
Step 3:

Run the Garbage Disposal and Check the Knockout Plug

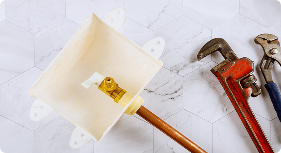
  • Run the disposal for 15 seconds, then attempt a drain to see if the water clears. If the dishwasher was installed or the disposal replaced recently, the dishwasher inlet knockout plug may still be in place. It's a factory disc sealing the disposal's dishwasher port, and it has to be tapped out before the drain hose is connected. Telltale sign: a newly installed or reconnected dishwasher that has never drained once.
Clear the Air Gap

Step 4:

Clear the Air Gap

  • If there's a small chrome cylinder on the countertop behind the faucet, twist off the outer cover and the plastic cap underneath. Clear any sludge from the chamber and reassemble. A partly blocked air gap slows the outflow enough to leave water behind, and often gurgles audibly during the drain.
Inspect and Flush the Drain Hose

Step 5:

Inspect and Flush the Drain Hose
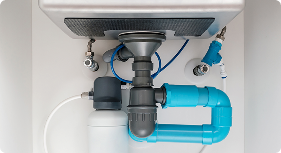
  • Pull the dishwasher forward or look under the sink for the corrugated drain hose. Straighten any kinks, especially where it passes behind the machine or through the cabinet wall. Disconnect it at the disposal or air gap end and flush it with water. Confirm the hose rises in a high loop under the countertop before dropping to the disposal. Without that loop, sink water siphons back into the tub and looks exactly like a drain failure. 
  • If the tub empties during the cycle but water reappears afterward, pour water into the disconnected hose. If it backs up into the tub, the check valve in that hose section has failed.
Check the Kitchen Sink Drain

Step 6:

Check the Kitchen Sink Drain

  • Fill the sink, release it, and watch how fast it clears. If the household drain is slow, the dishwasher has nowhere to push its water and no appliance repair will fix it. This is a plumbing call, not an appliance call.
     
Look for Error Codes

Step 7:

Look for Error Codes

  • Digital display models show F-codes. Models without a display flash the Clean light: it blinks the function number, pauses about two seconds, blinks the problem number, then repeats. Eight blinks, a pause, then one blink is an 8-1. 8-1 or F8E1 means a slow drain — the pump ran but water left too slowly. Clear the drain path first, then check the pump wiring, then the pump. 8-2 or F8E2 means a drain pump electrical fault — the control couldn't drive the pump at all. Check the wiring; if it's intact, the pump needs replacing. 3-3 or F3E3 means the drain hose check valve failed and dirty water is flowing back into the tub. 6-3 or F6E3 means suds or air in the pump. Dish soap in the tub causes this — use only dishwasher detergent.
     
Listen to the Drain Pump

Step 8:

Listen to the Drain Pump

  • Start a drain and listen at the bottom front of the machine. A steady hum with no water moving usually means the impeller is jammed or broken. Complete silence usually means the pump isn't getting power, pointing to wiring, the control board, or a failed pump winding. A healthy drain sounds like a rising whir followed by a slurp as the last water clears.


Get a Home Warranty for Unexpected Appliance Issues
Step 9:

Get a Home Warranty for Unexpected Appliance Issues
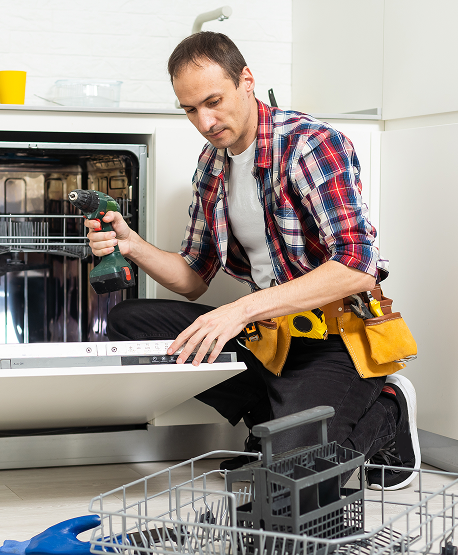
  • Drain pumps, control boards, and diverter motors fail without warning, and all three sit behind the dishwasher where a repair means pulling the unit out. Warranty providers like Liberty Home Guard cover a wide range of sudden appliance breakdowns, no matter which brand is in your kitchen.

Key Actions for Homeowners:

  • Scrape plates instead of pre-rinsing, and clean the filter monthly if your model has a removable one.
  • Run the garbage disposal before starting the dishwasher so the shared drain line is clear.
  • Use only detergent labeled for dishwashers, as dish soap creates suds that stall the drain pump. Check the air gap every few months if you have one, since it collects sludge quietly.
  • Run hot water at the sink until it's hot before starting a cycle.
  • After any plumbing work under the sink, verify the drain hose still has its high loop and hasn't been kinked.
Diagnostic & Troubleshooting

Most Common Repairs Needed to Fix a Kenmore Dishwasher

When your dishwasher won't drain, certain repairs are more commonly required than others. Below are the most frequent fixes: 

    • Replace the Drain Pump: The most common failed part. A jammed or broken impeller hums without moving water; a dead winding makes no sound at all.
    • Replace the Diverter Motor: Usually paired with poor wash results rather than standing water.


Frequently Asked Questions

Liberty Home GuardLiberty Home GuardLiberty Home GuardLiberty Home GuardLiberty Home Guard

The Most Consumer Centric
Home Warranty Provider.

Homeowners across the country recommend Liberty Home Guard Home Warranty above all others.
Don’t just take our word for it—Liberty Home Guard Reviews speak for themselves!

Today I had the pleasure of working ...

Today I had the pleasure of working with George Ramsey who was amazing. I want to thank him for his patience and for getting me th...

Darren C.

Liberty home Guard
Greatly appreciated George Ramsey an...

Greatly appreciated George Ramsey and his patience and expertise with walking me through my home warranty purchase. He got me a go...

Veronica W.

Liberty home Guard
Franklin A. Was great! Knowledgeable...

Franklin A. Was great! Knowledgeable and provided me with the resources that I need to serve customers correctly and professionall...

Appliances LLC

Liberty home Guard
Quick service, clear communications....

Quick service, clear communications. Very pleased with support from LHG and their service network. 

Joe M.

Liberty home Guard
They are a great company, I highly r...

They are a great company, I highly recommend them    

Woodley L.

Liberty home Guard
Liberty Home Guard covered the repai...

Liberty Home Guard covered the repair of my appliance. The whole process has handled quickly and efficiently. Very positive. The r...

Russel C.

Liberty home Guard
Joseph Santos was very respectful an...

Joseph Santos was very respectful and professional. He answered all my questions and addressed my concerns respectively. I was imp...

Abhinav P.

Liberty home Guard
Great manager and excellent communic...

Great manager and excellent communication , very professional, responsible and always willing to help issues quickly and fairly. A...

Lashonda S.

Liberty home Guard
I am impressed with the service I re...

I am impressed with the service I received from Keith Gordon. He explained extensively and clearly what in included in the warrant...

Alondra P.

Liberty home Guard
I had the pleasure of speaking with ...

I had the pleasure of speaking with Andrenina at Liberty Home Guard and I can't express how grateful I am for her outstanding serv...

Debra S.
Liberty home Guard
Liberty Home Guard
Appliance Acting Up?
Get Covered Before the
Next Breakdown
Get My Free Quote
Liberty Home Guard
Need help?

Talk to our Liberty Home Guard Agents 24/7.

(855) 953-9695