



Contemplating coverage?
Subscribe to receive our emails & get
$300 OFF!
Have questions?
Call us: (833) 544-8273

Expert-Reviewed Content: Guided by Editorial Standards

Written By Angel Vallejo
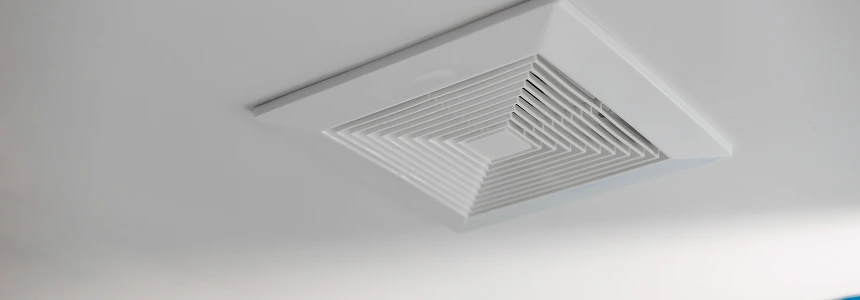
The U.S. Fire Administration recommends replacing bathroom exhaust fans every 10 years, since aging motors and worn wiring are a known contributor to fan-related electrical fires. If your fan is approaching that age, or already showing signs of trouble, replacement is the safer move over continued repairs.
This kind of trapped moisture damage in your home can spread beyond the bathroom if it’s left unaddressed.
Most bathroom exhaust fans last 8 to 10 years with regular cleaning. The U.S. Fire Administration recommends replacing fans at the 10-year mark because aging motors increase the risk of electrical faults. Fans that run loudly, move weak airflow, or fail to turn on have likely reached the end of their lifespan.
Not all exhaust fans are interchangeable. Before buying, measure the old unit’s housing dimensions and check the duct size so the new fan fits the existing opening and ductwork.
CFM Sizing by Bathroom Square Footage
Noise Level (Sones)
CFM only tells you how much air a fan moves; sones tell you how loud it is while doing it. ENERGY STAR certifies bathroom fans at 1.5 sones or lower for quiet operation. Older fans are often rated 3.5 sones or higher, which is roughly equivalent to the volume of normal conversation. When comparing models, check the sones rating alongside CFM rather than CFM alone.
Fans With Lights or Humidity Sensors
If you’re considering a combo fan-and-light unit, confirm your existing wiring can support it before buying one. Combo units typically need an additional wire connection for the light circuit, usually a second black wire on its own switch leg. If your current setup only has a single switch leg, you’ll need to either run new wiring or choose a fan-only replacement instead.
For more detail on swapping just the internal components, see this guide on bathroom exhaust fan motor replacement.
Before You Touch Any Wiring
Turn off the power to the bathroom exhaust fan at the circuit breaker. This is the single most important step in the entire project. Confirm with your non-contact voltage tester that no current is reaching the fan before you remove anything.
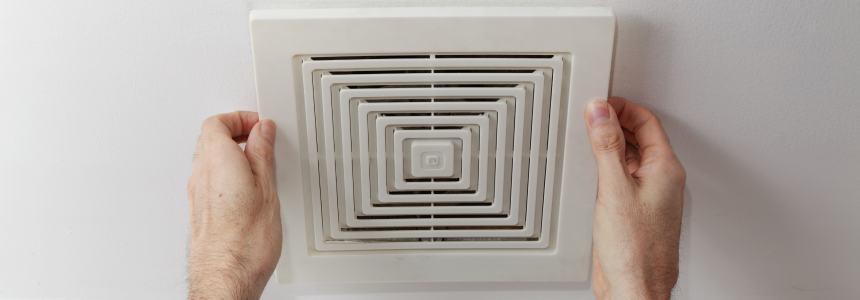
Start by removing the cover or grille of the old fan. This is usually held in place by screws, clips, or a simple snap-fit, depending on the model.
Use your screwdriver to remove the screws holding the fan housing in place. Carefully lower the unit from the ceiling, keeping the attached wiring intact so you don’t strain or tear the connections.
Callout: Replacing Without Attic Access
Not every bathroom has an accessible attic above it. If yours doesn’t, you can still complete this project entirely from below. After the old housing is unscrewed, use adjustable mounting brackets designed for ceiling installation without attic access. These brackets expand to grip the joists on either side of the opening from inside the room, so the new housing can be secured without ever climbing into the attic. The wiring and duct connections are handled the same way as a standard replacement; only the mounting method changes.
Note how the existing wires are connected before disconnecting anything. Typically you’ll see black (hot),white (neutral),and green or bare copper (ground) wires. Take a photo of the connections with your phone for reference.
Use your voltage tester again to confirm there’s no power before disconnecting the wires, then separate them and set the old housing aside.
Position the new fan housing in the ceiling opening and secure it with screws, or attach the mounting bracket first if your model requires it. Make sure the housing sits level and lines up squarely with the duct opening.
Reconnect the wiring using your photo or notes as a reference: black wire to black (hot),white wire to white (neutral),and green or bare wire to ground. Twist on wire nuts to secure each connection firmly.
Callout: Duct Sealing, Foil Tape vs. Cloth Tape
Reconnect the existing duct to the new fan housing. Standard cloth duct tape often fails within a year on duct connections because of repeated temperature cycling; the adhesive dries out and the seal opens up. Use foil tape (also sold as HVAC foil tape) or a mastic sealant instead, both of which hold up over the long term and keep the connection airtight.
Callout: Fans Above Tubs or Showers, NEC Requirement
If the fan is installed directly above a tub or shower enclosure, it must be UL-listed for wet or damp locations and connected to a GFCI-protected circuit, per the National Electrical Code. If your bathroom doesn’t already have GFCI protection on that circuit, hire a licensed electrician for this part of the installation.
Once the wiring and duct are secure, snap or screw the fan cover back into place.
Turn the circuit breaker back on and switch on the fan. Confirm it spins freely without unusual noise or vibration.
Run the steam test: take a hot shower and check whether the fan clears condensation from the mirror within a few minutes. Listen for the noise level, it should be close to the sones rating on the box rather than a loud hum. Finally, hold a tissue near the exterior vent cap outside to confirm air is actually exiting the duct, which rules out a back-pressure or blockage problem.
Fan has power but does not spin. Check that the motor connector is fully seated on the housing terminals. If the motor hums but the blade doesn’t turn, the motor itself may be defective; see the guide on bathroom exhaust fan motor replacement for next steps.
Fan runs but does not remove steam. The fan may be undersized for the bathroom, or the duct may be blocked, kinked, or venting into an unconditioned space rather than outdoors. Double-check the CFM rating against your bathroom’s square footage and inspect the full duct run from the housing to the exterior vent cap.
Fan is louder than expected. Check that all mounting screws and bracket connections are tight; vibration from a loose housing is the most common cause of unexpected noise. If the sound is a constant hum rather than vibration, confirm the fan you installed is actually rated at 1.5 sones or lower.
A clean fan is only half the job. For a deeper clean of the blades and housing, see how to clean your exhaust fan.
A bathroom exhaust fan replacement is a manageable weekend project for most homeowners, but electrical work always carries some risk. If you’d rather not handle it yourself, or if your home’s wiring needs more than a straightforward swap, a licensed professional can take it from here. Liberty Home Guard’s home warranty plans can also help cover the cost of repairs for other home systems and appliances when something unexpected goes wrong.
Reviewed by Angel Vallejo, a home maintenance writer who covers practical, trade-accurate guidance for homeowners tackling repairs themselves.
There’s a reason Liberty Home Guard was rated the #1 Home Warranty
Service by U.S. News and World Report for 2021, 2022, 2023, 2024, and 2026. Check out our services.
Most homeowners can replace a bathroom exhaust fan without hiring a professional. The job requires basic tools, the ability to safely cut power at the breaker, and comfort reconnecting three wires. If the existing ductwork and wiring are already in place, a replacement typically takes two to four hours.
Match the fan's CFM rating to your bathroom's square footage, using roughly 1 CFM per square foot as a baseline. Also check the sones rating for noise and confirm the duct size matches your existing connector, typically 4 to 6 inches.
If the housing is in good condition, you can often replace just the motor and fan blade assembly without removing the housing. Replacement motor kits typically cost $25 to $50 and take less than an hour. Check the fan brand and model number to find a compatible motor kit.
An electrician is not required if the existing wiring and circuit are already in place. You can safely reconnect the same three wires: black (hot),white (neutral),and green or bare copper (ground). Hire a licensed electrician only if you need new wiring, a new circuit, or are installing above a tub or shower without existing GFCI protection.
Most replacements take two to four hours when the ductwork and wiring are already in place. Add extra time if you're installing mounting brackets for a no-attic-access setup or running new wiring for a combo fan-and-light unit.
With regular cleaning and maintenance, most fans last 8 to 10 years before needing replacement. The U.S. Fire Administration recommends replacement at the 10-year mark regardless of apparent condition, since internal wear isn't always visible from the outside.
Stay Ahead of Potential
Home Mishaps!
Subscribe to our Liberty Home Guard Newsletter and gain access to exclusive content that ensures your peace of mind.

Subscribe to receive our emails & get
Have questions?
Call us: (833) 544-8273