






Contemplating coverage?
Subscribe to receive our emails & get
$300 OFF!
Have questions?
Call us: (833) 544-8273


Expert-Reviewed Content: Guided by Editorial Standards

Written By Rachel Cherem
An AC water leak can trace back to a clogged condensate drain line, frozen evaporator coils, a dirty air filter, or a cracked drain pan. When your system cannot properly drain condensation, water backs up and overflows into the home. This guide walks you through each cause, how to confirm it, and exactly what to do next.
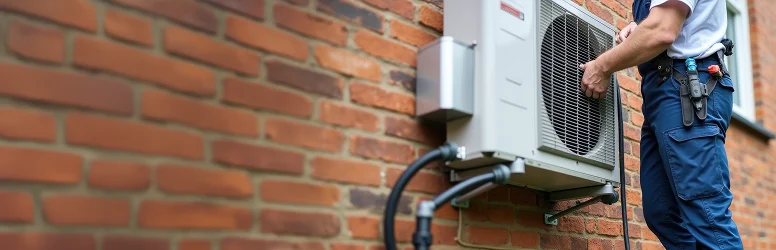
Most AC water leaks share a common thread: condensation that cannot drain properly backs up and escapes the system. The six causes below cover the overwhelming majority of service calls. Each section includes how to confirm the problem, DIY fix steps, and when to hand it off to a professional.
According to Trouble Free Inc., clogged condensate drain lines account for approximately 80% of AC water leak service calls. Your AC pulls humidity from indoor air, and that moisture collects in the condensate drain pan before draining out through a PVC drain line. Over time, algae, soot, dust, and grime build up inside that line and block the flow.
When the drain line clogs, water overflows the pan and drips into your home. This is the first place to check.
How to confirm it: Look for standing water in the drain pan under the air handler. If the pan is full and the line feels wet but nothing is draining, the line is clogged.
DIY fix steps:
Cost range: Professional drain line clearing typically runs $150 to $300.
A note on condensate pumps: Basement and lower-level AC systems cannot rely on gravity to move water to a drain. These installations use a condensate pump to lift water up and out. If your system is below grade and you find no clog in the line, inspect the condensate pump. A failed float switch or burned-out pump motor will cause water to back up just as a clog does. Pump replacement typically costs $250 to $500 installed.
The evaporator coil sits inside your air handler and absorbs heat from indoor air. If airflow across the coil is restricted, or refrigerant levels drop too low, the coil can drop below freezing and ice over. When the system cycles off, that ice melts and overwhelms the drain pan.
How to confirm it: Turn off the AC and open the air handler access panel. Ice on the coil or coil fins confirms the problem.
DIY fix steps:
Cost range: Coil cleaning runs $100 to $400. Refrigerant-related repairs vary depending on the cause of the loss.
A dirty air filter restricts airflow across the evaporator coil. Restricted airflow drops coil temperature below freezing, the coil ices over, and when the ice melts, water leaks from the unit. The fix is simple, but many homeowners wait too long between changes.
Air filters should be replaced every one to three months. In homes with pets, high dust levels, or poor outdoor air quality, monthly replacement is appropriate.
How to confirm it: Pull the filter. If it is visibly gray, packed with debris, or you cannot see light through it, it needs replacing.
DIY fix steps:
Refer to our guide on taking care of your AC unit for a full filter maintenance walkthrough.
Cost range: Filters cost $5 to $40 depending on type. This is a DIY task with no labor cost.
The condensate drain pan sits directly under the evaporator coil to catch dripping condensation. In older systems, this pan can rust through or develop pinhole cracks. The pan still collects water, but it leaks through the damaged area before the water ever reaches the drain line.
How to confirm it: Use a flashlight to inspect the pan. Look for rust staining, visible cracks, or standing water that is not draining through the line. To check for pinhole leaks, dry the pan completely with a cloth, then watch for water seeping through the metal rather than draining out.
DIY fix steps:
A corroded drain pan is often a signal that other components in an aging system are approaching end of life. Have a technician assess the full system while addressing the pan.
Cost range: Drain pan replacement typically runs $400 to $700 installed.
Your AC’s refrigerant circuit is a closed system. Refrigerant does not get "used up" over time, so a low reading always points to a leak somewhere in the system. Low refrigerant reduces pressure in the evaporator coil, causes it to ice over, and leads to the same melt-water leak described under cause two.
How to confirm it: Signs include warm air from the vents, a hissing or bubbling sound near the refrigerant lines, and a system that runs constantly without cooling effectively. A technician must confirm with a pressure test.
Important: Refrigerant handling requires EPA Section 608 certification. Homeowners cannot legally or safely purchase, handle, or add refrigerant themselves. If low refrigerant is the cause, call a licensed HVAC technician. Attempting a DIY fix can void your warranty, violate federal law, and pose safety risks.
Cost range: Refrigerant leak repairs vary widely based on the location and severity of the leak.
There’s a reason Liberty Home Guard was rated the #1 Home Warranty
Service by U.S. News and World Report for 2021, 2022, 2023, 2024, and 2026. Check out our services.
A drain pan or drain line that is not properly leveled during installation will allow water to pool in the wrong spot and overflow. An installer who undercharges refrigerant creates a low-refrigerant condition from day one.
How to confirm it: Installation issues typically surface within the first few weeks of a new system or following a recent service visit. If your system had operated without a problem for years before a leak appeared, look at the other causes first.
What to do:
If the installation is under warranty, the contractor should correct the issue at no charge.
Some AC water leaks are immediately obvious. Others build quietly over days or weeks. Watch for these warning signs:
An AC water leak becomes an emergency when water reaches electrical components, actively drips through a ceiling or wall, or when visible mold growth is present near the unit. In those situations, turn off the AC at the thermostat and cut power to the unit at the breaker immediately. Minor condensation dripping in humid weather outside the home is typically not urgent, but any indoor leak that is active, growing, or near wiring should be treated as a priority repair.
The EPA identifies HVAC condensate leaks as a significant indoor moisture source and a leading contributor to mold growth. Mold can begin colonizing wet drywall and insulation within 24 to 48 hours of water exposure. That timeline is short enough that an active leak into a wall or ceiling warrants same-day attention.
Stop running the unit and cut power if any of the following conditions are present:
Running a leaking AC risks mold growth, ceiling and wall damage, and electrical hazards that can worsen quickly. Turn the unit off until the cause is identified and repaired. If the leak is minor condensation dripping outside the home at the condensate line exit point, brief continued use may be acceptable, but the issue should still be diagnosed and resolved promptly. When in doubt, turn it off.
Repair costs range from under $10 for a filter replacement to several thousand dollars if a leak has caused mold or structural damage. The table below reflects typical ranges for the most common repairs.
Repair Type | DIY or Professional | Cost Range |
|---|---|---|
Condensate drain line clearing | DIY or Professional | $0 (DIY) to $300 |
Drain pan replacement | Professional | $400 to $700 |
Condensate pump installation | Professional | $250 to $500 |
Mold or drywall repair from water damage | Professional | $500 to $3,000 |
These ranges reflect parts and labor in most U.S. markets. Costs can run higher in high cost-of-living areas or for systems that are difficult to access.
Not all AC systems leak for the same reasons or in the same locations. Here is what to know by system type.
Central systems have an indoor air handler, an outdoor condenser unit, and a network of ductwork. Water leaks almost always originate at the indoor air handler, where the evaporator coil and condensate drain pan are located.
Common causes specific to central systems include long or horizontal drain line runs that are more prone to clogging, failed float switches that should shut the system down when the pan fills, and drain pans that can rust through in systems that are 10 or more years old.
If your central AC is not cooling and you notice a leak, suspect a frozen coil or refrigerant issue first.
Window units are self-contained, and a small amount of water dripping from the back of the unit to the outside is normal and expected. The unit is designed to drain condensation away from the home.
A window AC leak becomes a problem when water drips into the room rather than outside. This usually traces back to one of three causes: the unit is not tilted slightly toward the outside (the rear should sit about half an inch lower than the front to direct drainage outward); the drain holes at the base of the unit are clogged with debris; or the unit has been installed in a window that does not allow for proper pitch. Tilt correction and drain hole cleaning are both DIY tasks.
Mini split systems have an indoor air-handling head unit mounted high on the wall and a small condensate drain line that runs to the outside or to a nearby drain. Leaks from the indoor head unit are typically caused by a clogged drain line, a disconnected drain hose fitting, or a frozen evaporator coil from low refrigerant.
Because the head unit is wall-mounted, water from a blocked drain line often runs behind the unit and down the wall before it becomes visible. If you notice water stains on the wall below the head unit, check the drain line for kinks, clogs, or a disconnected fitting at the back of the unit.
Avoiding these mistakes can prevent minor leaks from becoming expensive repairs.
A consistent maintenance routine eliminates most AC water leak causes before they develop. Key tasks:
For a full seasonal checklist, see our guide on taking care of your AC unit.
AC water leak repairs can run anywhere from $150 for a drain clearing to $3,000 or more if water damage has reached drywall or triggered mold remediation. A home warranty with HVAC home warranty coverage protects you from those out-of-pocket costs when a covered component fails. Liberty Home Guard’s home warranty plans include robust HVAC coverage, so when your AC needs service, you file a claim rather than absorb the full repair bill. Call (866) 983-0874 to review your coverage options.
An AC leaks water when the system cannot properly drain the condensation it produces. The most common causes are a clogged condensate drain line, frozen evaporator coils, a dirty air filter, and a cracked or corroded drain pan. When any of these problems is present, water backs up and overflows into the home rather than draining safely out of the system.
For the most common cause, a clogged drain line, follow these steps:
1. Turn off the AC at the thermostat and the breaker.
2. Locate the condensate drain line near the air handler.
3. Use a wet/dry vacuum to pull the blockage free from the line's end.
4. Pour a 50/50 mixture of white vinegar and water into the drain line access port.
5. Wait 30 minutes for the solution to break down buildup.
6. Flush the line with clean water.
7. If the leak continues, call a licensed HVAC technician to inspect the system.
It depends on the conditions. Water near electrical components, active dripping through a ceiling or interior wall, or visible mold growth near the unit are all emergency situations that require immediately turning off the AC and cutting power at the breaker. In those cases, do not wait. Minor condensation dripping outside the home in humid weather is typically not urgent, but any indoor leak that is active or growing should be treated as a priority.
It is not advisable. Running a leaking AC risks mold growth, ceiling and wall damage, and electrical hazards that can escalate quickly. The unit should be turned off until the cause is identified and repaired. If the only moisture visible is condensation dripping at the outdoor drain line exit point, brief continued use may be acceptable, but the underlying issue should still be diagnosed and resolved without delay.
Stay Ahead of Potential
Home Mishaps!
Subscribe to our Liberty Home Guard Newsletter and gain access to exclusive content that ensures your peace of mind.

Subscribe to receive our emails & get
Have questions?
Call us: (833) 544-8273