




Contemplating coverage?
Subscribe to receive our emails & get
$300 OFF!
Have questions?
Call us: (833) 544-8273

Expert-Reviewed Content: Guided by Editorial Standards

Written By Angel Vallejo
A stripped screw can turn a five-minute fix into a frustrating standoff. The good news: most stripped screws come out without special tools or expensive extractors, and without damage to whatever you’re working on, as long as you work through the right methods in the right order.
This guide walks you through a quick assessment, the safest low-risk tricks to try first, and when to escalate to more advanced techniques. Use the checklist below to figure out where to start.
Quick decision checklist:
Answering these four questions will point you to the right section below.
A little prep prevents most of the damage that turns a stuck screw into a bigger repair.
Is the head protruding, flush, or recessed? A screw head that sticks up above the surface gives you the most options, including gripping tools like pliers. Flush or recessed heads limit you to methods that work through the existing bit slot or require cutting a new one.
What’s the head type? Phillips and flathead screws strip most easily because the drive shape is shallow. Torx, hex/Allen, and Robertson screws grip better and usually respond well to a snug-fitting bit and a little more pressure.
What’s the material? Wood is forgiving and tolerates cutting or drilling. Metal holds up to heat and penetrating oil. Plastic and electronics are the most fragile: heat, aggressive torque, or oversized tools can crack or deform them.
Is it seized by rust or threadlocker? Look for orange-brown rust flaking around the threads, or a screw that won’t budge at all despite a good bit fit. That resistance without stripping further is often threadlocker adhesive.
Start here regardless of material or head type. These methods rely on things you likely already have at home.
Rubber band or friction paste
The rubber band fills the worn-out grooves and gives the bit something to bite into. Valve grinding compound or a dab of drawer-liner friction paste works the same way if you have it on hand.
Try a bigger or alternate bit
A snugger fit gives the bit more surface area to grip instead of spinning in the worn-out slot.
Duct tape or painter’s tape
Like the rubber band trick, the tape adds grip while protecting the surrounding finish from slips.
Tighten slightly, then loosen Turn the screw clockwise about an eighth of a turn before attempting to back it out. This small movement can break the initial friction bond that’s keeping a stuck screw from turning, without adding further wear to the stripped head.
When there’s enough head exposed to grip, you have stronger options.
Locking pliers (Vise-Grips)
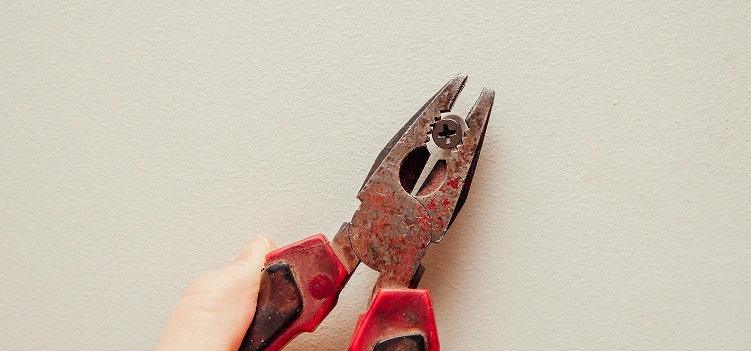
Pad the jaws or nearby surface with cloth to avoid scratching finished wood or metal.
Epoxy a nut to the headCaution: use only on sturdy, non-delicate surfaces. Never use on electronics or fine furniture.
This method risks damaging finishes if epoxy spreads, so mask the area well beforehand.
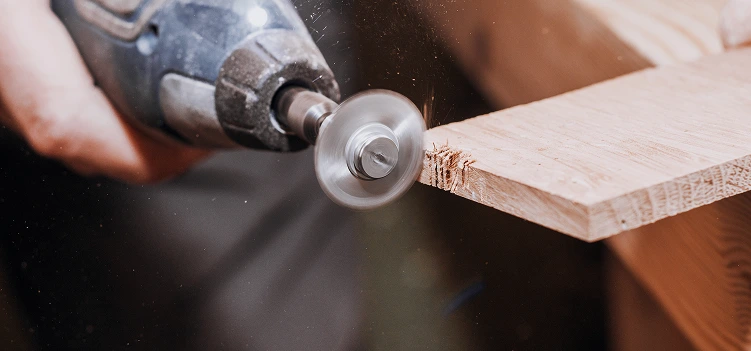
Cut a new slot with a rotary tool
Caution: rotary tools throw sparks and dust. Protect surrounding surfaces and wear eye protection.
Manual impact driver Good for metal hardware, hinges, and door fixtures.
Avoid this method on brittle materials or thin sheet metal, which can crack or dent under the impact.
Left-hand drill bit
Use cutting oil when drilling into metal to reduce heat and bit wear.
Screw extractor kit
Extractors are effective but unforgiving. A broken extractor tip is very hard to remove, so patience here matters more than with any other method.
Penetrating oil
Heat to break threadlocker
Never use an open flame, and never apply heat near plastic components, electronics, or anything that could deform or ignite.
Electronics deserve their own approach. The margin for error is much smaller.
Use precision tools only Match the bit size exactly. Household hacks like rubber bands or oversized bits are more likely to crack the casing or strip the screw further on tiny electronics hardware.
Micro extractor kits Dedicated precision extractor sets are built for electronics-sized screws and require very light torque. Let the tool do the work rather than forcing it.
Power down and protect components Disconnect the battery if possible before working near the board. Skip adhesives and heat entirely; both can damage nearby components.
Drill off the head
Caution: this method risks real damage to surrounding material. Mask the area generously first.
Wood-only plug method
Good prevention habits extend beyond fasteners, too. Staying on top of routine upkeep, like knowing how to schedule routine home maintenance or remembering to change your HVAC filters, reduces the number of small repairs that turn into stuck-screw situations in the first place. The same goes for tasks like learning to take the best care of your AC unit or knowing how to prevent moisture and mold before it damages hardware and finishes.
Some situations call for stepping back:
Knowing when to call in help applies to bigger home systems, too. The same judgment that tells you to decide when to replace a refrigerator or troubleshoot common dishwasher problems is worth applying here: if a small fix risks a bigger mess, it’s worth pausing.
Getting a stripped screw out is a DIY job. But it’s often a sign you’re mid-repair on something larger, like an appliance panel or a piece of home hardware. That’s where a home warranty can help. Liberty Home Guard’s plans are designed to help cover the repair or replacement of home systems and appliances that fail from normal wear and tear, and covered repairs include labor, installation, removal, disposal, and haul-away, backed by a 365-day workmanship guarantee. Coverage is available nationwide across all 50 states plus D.C.
Coverage varies by plan, so it’s worth reviewing your plan terms and contract for specifics. This article is DIY guidance only and doesn’t reflect coverage for screw removal as a standalone service. If you’re weighing your options, it’s worth looking into affordable home warranty plans and understanding how much you can save with a home warranty as part of a broader preventive care plan for your home.
There’s a reason Liberty Home Guard was rated the #1 Home Warranty Service by U.S. News and World Report for 2021, 2022, 2023, 2024, and 2026. Check out our services.
Learn MoreStart with a rubber band or friction paste, make sure you're using the correct bit size, and apply steady pressure. If the head is protruding, locking pliers are a strong next option
Try the lowest-risk methods first: a rubber band, a larger bit, or cutting a new slot with a rotary tool. As a last resort, drill off the head and back out the remaining shank with pliers.
Penetrating oil, a left-hand drill bit, a manual impact driver, or an extractor kit all work well on metal. Use cutting oil and go slowly to avoid excess heat or a broken bit.
Avoid heat and aggressive force. A rubber band or tape for extra grip, a correctly sized precision bit, and very light torque are your safest bets.
Apply penetrating oil and let it sit before trying again. For threadlocker, targeted heat from a soldering iron can help, but avoid heating anything delicate or plastic nearby.
Use the right bit type and size, pre-drill pilot holes, keep your driver aligned with steady downward pressure, and consider switching to Torx or Robertson fasteners for future projects.
Stay Ahead of Potential
Home Mishaps!
Subscribe to our Liberty Home Guard Newsletter and gain access to exclusive content that ensures your peace of mind.

Subscribe to receive our emails & get
Have questions?
Call us: (833) 544-8273