



Contemplating coverage?
Subscribe to receive our emails & get
$300 OFF!
Have questions?
Call us: (833) 544-8273

Expert-Reviewed Content: Guided by Editorial Standards

Written By Ally Sabatina
If your pool is losing water faster than the weather can explain, you likely have a pool leak. Left unaddressed, even a slow leak wastes thousands of gallons, throws off your water chemistry, and quietly erodes the structure around your pool. This guide walks you through how to confirm a leak, locate the source, and decide whether to fix it yourself or call a professional, along with what each option will cost.
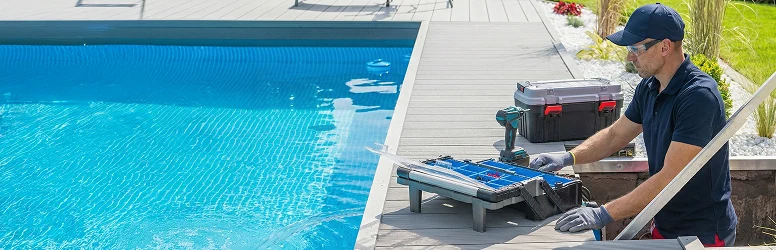
Water loss is normal. The question is how much. Before spending money on a technician, you need to determine whether you are dealing with a genuine pool leak or ordinary evaporation accelerated by heat, wind, or heavy use. Understanding the common pool problems that mimic each other is the first step toward an accurate diagnosis.
Losing more than two inches of water per week, about 1/4 inch per day, is a likely sign of a leak. This baseline aligns with American Leak Detection’s published evaporation standard and accounts for typical climate and usage conditions. If your pool consistently drops more than that, treat it as a leak until proven otherwise.
If you suspect a pool leak, look for these six signs before calling a technician:
The bucket test is the simplest way to separate evaporation from a genuine leak. You need a five-gallon bucket, a marker or tape, and 24 hours.
One note: repeat the test with the pump off if the first result is borderline. A significant difference between pump-on and pump-off results points toward a plumbing or equipment leak rather than a shell or liner issue.

Confirming a leak is step one. Locating it is step two. Work through the following four checks in order; most residential pool leaks are found before you reach step four.
Walk the equipment pad before you inspect anything else. Look for a wet pad surface, standing water near the pump housing, drips at pipe fittings or union connections, and moisture around the heater and filter housing. Leaks at equipment connections are among the easiest to fix and the most commonly overlooked because homeowners focus on the pool shell first.
With the equipment ruled out, move to the pool itself. Scan the shell surface for visible cracks, paying extra attention to the waterline, corner transitions, and any point where two materials meet, such as where a plastic fitting threads into a concrete shell. Inspect the skimmer throat and the return jet fittings for hairline cracks or separation from the surrounding plaster.
Light niches are another frequent leak point. Run your hand around the rim of each light fixture housing; even slight movement or separation from the shell can allow water to escape.
When you can see a suspicious crack or gap but are not certain it is active, a dye test removes the guesswork. Purchase leak detection dye at any pool supply retailer, typically available in a squeeze bottle or syringe.
Turn off the pump and wait for the water to still. Apply a small stream of dye directly in front of the suspected crack, fitting, or gasket. If water is escaping through that point, the dye will be drawn toward the opening rather than dispersing evenly in the surrounding water. A strong directional pull indicates an active leak; slow drift with no pull suggests the area is intact.
Apply dye at: the skimmer throat, return jet fittings, the main drain, light fixture rims, and any visible shell cracks. Document where the dye pulls so you can reference it during repair.
If the equipment, shell, and skimmer all check out clean, the leak is likely underground. At this point, call a licensed pool technician. Pressure testing requires isolating individual plumbing lines and introducing air or water under controlled pressure to identify where a line is compromised. This is not a DIY procedure.
One early sign that underground pipe failure is the culprit: soil erosion in a pattern radiating from the pool wall, particularly near return lines. If you notice patches of sunken or washed-out soil before completing any other tests, mention it to your technician when you call.

The most common pool leaks occur at the skimmer and around fittings where two materials meet. Skimmer cracks, gasket failures, and return jet fittings account for the majority of residential pool leaks because these are the highest-stress connection points in the pool shell. The five categories below cover the full range of leak sources you are likely to encounter.
Vinyl liners are cost-effective and customizable, but they are vulnerable to tears, particularly at seams and around fittings where the liner is punctured and secured. The typical pool liner lasts from eight to twenty years; weather conditions, pool shape, and liner material all affect that range. Inspect the liner regularly for separation at the seams or small punctures near return jets and light housings.
Liner failure presents differently depending on pool type. Vinyl above-ground pool liners are more prone to seam tears from freeze-thaw cycles and are generally repairable with a DIY vinyl patch kit. Inground vinyl liners may require professional patching or full replacement if the tear is large or near a main fitting. Fiberglass shells can develop spider cracks in the gelcoat that allow slow water migration, while gunite and concrete pools are susceptible to structural cracks that require hydraulic cement or epoxy injection rather than a simple patch.
Your pump circulates and filters the water; when it begins to fail, water loss and chemical imbalance follow quickly. Beyond standing water near the equipment pad, watch for a pressure gauge that drops suddenly during operation, gurgling sounds when the pump is running, and moisture or mineral deposits on the pump housing itself. These symptoms often indicate a failing shaft seal or a cracked pump body rather than a plumbing leak further downstream.
Chemical imbalances caused by a struggling pump accelerate corrosion throughout the system, which can create secondary leaks at fittings and connections if left unaddressed.
A neglected filter strains every component connected to it. Normal pool filter operating pressure runs between 10 and 25 PSI; a reading that climbs 8 to 10 PSI above your baseline signals a clog or internal failure that stresses connections and can drive leaks at the multiport valve or filter tank seams. Inspect your filter annually, check the backwash valve for wear or cracking, and consider replacing the filter every five years or when water clarity and pressure readings begin to degrade despite regular maintenance.
The skimmer is one of the most common leak sources in concrete and gunite pools. The most vulnerable point is the joint where the plastic skimmer body meets the surrounding concrete or gunite shell. Over time, ground movement and temperature cycling cause that joint to separate, creating a gap that can drain significant water volume before it becomes visible.
During regular maintenance, inspect the skimmer throat for hairline cracks and press gently on the gasket to check for softness or deterioration. Debris overload can also stress the hydrostatic and multiport valves, accelerating wear. A skimmer leak caught at the gasket stage is one of the most affordable pool repairs you will face.
Underground leaks are the most difficult to detect and the most expensive to repair. Concrete movement, rust on older steel-reinforced shells, and tree root intrusion can stress pool walls and plumbing lines over years without producing visible surface symptoms.
The most reliable way to confirm underground pipe failure is a pressure test performed by a licensed technician, who isolates individual plumbing lines and introduces pressure to identify where a line has failed. Before that test is even ordered, look for soil erosion radiating outward from the pool wall near return lines; that pattern of washed-out or sunken soil is often the first visible indicator that a pipe is leaking underground. Higher water bills without any other explanation should also prompt a plumbing inspection.
Several common pool leaks are well within DIY reach, and most can be completed without draining the pool:
Some repairs exceed what a patch kit can address. Call a licensed pool repair company for:
One critical safety note: never fully drain a pool set in clay-heavy soil without consulting a professional first. Clay soil retains groundwater pressure against the exterior of the shell; removing the counterweight of the pool water can cause the shell to pop out of the ground due to hydrostatic pressure. Partial draining is often sufficient for most structural repairs and carries far less risk.
Yes, many pool leaks can be fixed without draining the pool. Minor liner tears, skimmer gasket failures, and small shell cracks can be repaired with underwater epoxy or vinyl patch kits. Larger structural cracks and underground plumbing leaks typically require partial or full draining.
Repair Type | DIY Cost | Professional Cost |
Vinyl patch kit (liner tear) | $10 to $30 | $150 to $300 |
Skimmer gasket replacement | $15 to $50 | $100 to $250 |
Pool putty or epoxy (fittings, lights) | $10 to $40 | $150 to $400 |
Full liner replacement | Not recommended | $1,000 to $3,500 |
Underground pipe repair | Not recommended | $1,000 to $5,000+ |
Structural crack repair | $20 to $100 (minor) | $500 to $2,500+ |
Pool leak detection costs an average of $300, with inground inspections that require excavation reaching up to $1,000, according to Angi (2026). Inground pools generally cost more to diagnose and repair than above-ground pools because access to fittings, plumbing lines, and the shell itself is more limited. If your technician suspects underground pipe failure, budget for the higher end of the detection range before any repair work begins.
The cost of delay compounds quickly. A skimmer crack caught at the gasket stage may run $100 to $250 to repair. Left unaddressed, the same crack allows water to migrate behind the pool shell and undermine the surrounding concrete deck, pushing repair costs above $5,000 once structural remediation is factored in.
Beyond the pool itself, an ongoing leak erodes the surrounding landscape, removes soil stability near your home’s foundation, and creates standing water that breeds mosquitoes. The EPA estimates the average household’s leaks waste more than 9,300 gallons of water per year; a pool leak running through a full season can exceed that figure on its own. For broader context on how water intrusion affects home systems, see our guide to water leak detection in home systems.
Chemical imbalances follow automatically: every gallon lost is replaced by fresh water that dilutes sanitizer and throws off pH, requiring more product and more adjustments to keep the water safe. Equipment strain compounds on top of that as your pump works harder to maintain flow through a compromised system.
The straightforward calculus: catching a pool leak early costs hundreds; missing it costs thousands. Maintain a consistent pool maintenance routine and run the bucket test at the first sign of unusual water loss.
Liberty Home Guard is one of a few home warranty providers that offers pool repair coverage as an elective add-on. LHG subscribers can add coverage for a standalone pool or spa, a pool-spa combo, or a saltwater pool. For combination pool-spa coverage to apply, the two systems must share the same components; otherwise, a separate add-on is required for each.
Home warranty coverage fills a different gap than homeowners insurance. Insurance covers sudden and accidental damage; a home warranty covers mechanical and system failures caused by normal wear and tear. That distinction matters for pool owners: a pump that fails after years of use is a warranty claim, not an insurance claim.
Where LHG differs from most home warranty providers is in how it handles edge cases. Many companies issue a flat denial the moment a repair falls outside the written coverage list. LHG may, in its discretion, work with homeowners on situations that fall outside standard coverage terms, something most competitors do not do at all.
Covered by LHG Pool Add-On | Outside Standard Coverage |
|---|---|
Above-ground equipment and wiring | Blowers |
Heater | Cartridges |
Motor | Cleaning equipment (pool sweeps, pop-up heads, skimmers, chlorinators, ionizers) |
Pump | Control panels and electronic boards |
Cracked or corroded casings | |
Disposable filtration mediums | |
Fill line | |
Fountains, waterfalls, and associated systems | |
Fuel storage tanks | |
Gaskets | |
Grids | |
Heat pump | |
Jets | |
Liners | |
Pool cover and related equipment | |
Portable or above-ground pools/spas | |
Relays and switches | |
Salt water generators and components | |
Structural defects | |
Timers |
LHG has been rated the number one home warranty service by U.S. News and World Report. Review the full terms in the LHG sample contract before purchasing. To add pool and spa protection to your plan, explore pool and spa add-on coverage.
There’s a reason Liberty Home Guard was rated the #1 Home Warranty Service by U.S. News and World Report for 2021, 2022, 2023, 2024, and 2026. Check out our services.
Learn MoreLosing more than two inches of water per week, or about 1/4 inch per day, is a likely sign of a leak rather than normal evaporation. Confirm it with the bucket test: if the pool loses more water than a bucket placed on a submerged step over 24 hours, a leak is present.
Common signs include unusual water loss, wet spots in your yard, cracked or shifting tiles, autofill constantly running, algae growth, and rust or corrosion on above-ground plumbing.
The most common pool leaks occur at the skimmer and around fittings where two materials meet. Skimmer cracks, gasket failures, and return jet fittings account for the majority of residential pool leaks because these are the highest-stress connection points in the pool shell.
Yes, many pool leaks can be fixed without draining the pool. Minor liner tears, skimmer gasket failures, and small shell cracks can be repaired with underwater epoxy or vinyl patch kits. Larger structural cracks and underground plumbing leaks typically require partial or full draining.
Professional pool leak repairs range from $150 for a simple gasket replacement to $5,000 or more for underground pipe failures. Pool leak detection costs an average of $300 according to Angi, with inground inspections requiring excavation reaching up to $1,000. See the cost table above for a full breakdown by repair type.
1. Fill a bucket three-quarters full with pool water and place it on a submerged pool step.
2. Mark the water level inside the bucket and on the pool wall.
3. Run the pump on its normal schedule for 24 hours.
4. Compare both marks: if the pool has lost more water than the bucket, a leak is confirmed; if loss is equal, normal evaporation is the likely cause.
Call a repair technician if you cannot successfully diagnose, access, or repair the source of your pool leak, or if you have extensive tile damage, underground pipe leaks, or irreparable degradation of your pool liner.
Liberty Home Guard offers pool repair coverage as an add-on that covers above-ground equipment and wiring, heaters, motors, and pumps when they break due to normal wear and tear, though it does not cover liners, structural defects, or cleaning equipment.
Stay Ahead of Potential
Home Mishaps!
Subscribe to our Liberty Home Guard Newsletter and gain access to exclusive content that ensures your peace of mind.

Subscribe to receive our emails & get
Have questions?
Call us: (833) 544-8273