


Wait Before You Go…
Cover all your home appliances under one
simple plan.
$200 OFF
+2 FREE Bonus Months
Your free quote is just a click away..
Have questions? Call us: (833) 543-7582
Exit
45% of reported issues are the
Faulty Drain Pump![]()
30% of reported issues are the
Worn Tub Seal or Bearing![]()
20% of reported issues are the
Loose or Damaged Hoses![]()
5% of reported issues are the
All Other Causes![]()
Extended warranties only cover one item. Liberty Home Guard protects all your appliances and systems under one simple plan.
If it breaks, we’ve got you covered—no matter the brand.
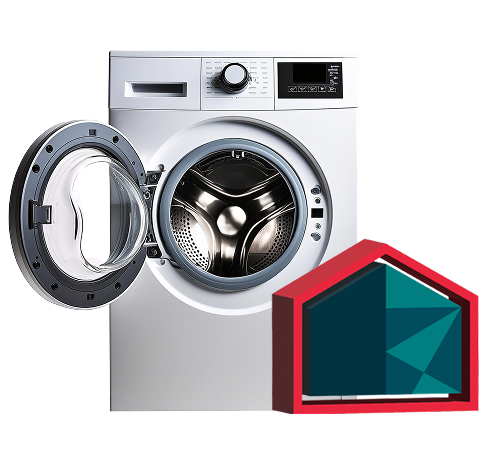
Is Your Whirlpool Washer Leaking From the Bottom? This step-by-step guide covers everything from hoses to seals and drain pumps, offering practical solutions.

Step 1:
Unplug the Washer

Step 2:
Inspect the Water Supply Hoses

Step 3:
Check the Drain Hose

Step 4:
Examine the Drain Pump

Step 5:
Inspect the Tub Seal

Step 6:
Look for Cracks in the Outer Tub

Step 7:
Test the Water Inlet Valve

Step 8:
Run a Test Cycle

Step 9:
Get a Home Warranty for Multi-Appliance Coverage


When your washer is leaking from the bottom, certain repairs are more commonly required than others. Below are the most frequent fixes:
If your washer only leaks during the spin cycle, it's likely due to a worn tub seal or a damaged drain pump. These components are under the most stress during spinning, and leaks from these areas typically appear underneath the washer. Inspect these parts for signs of wear or cracking.
Yes, a clogged or improperly installed drain hose can cause water to back up and overflow inside the washer, leading to leaks from the bottom. Make sure the hose is not kinked, cracked, or clogged, and check that it’s securely connected to both the washer and the wall drain.
Continuing to use a leaking washer is not recommended. Even small leaks can lead to bigger issues like water damage to floors, electrical hazards, or mold growth. It's best to diagnose and fix the problem as soon as possible or call in a professional if you're unsure of the cause.
The cost can vary depending on the source of the leak. Replacing a simple drain hose might cost $20–$50, while replacing a drain pump or tub seal could run $150–$300 with labor. If your washer is still under warranty or covered by a home warranty plan, repair costs could be significantly reduced or even fully covered.
Homeowners across the country recommend Liberty Home Guard Home Warranty above all
others.
Don’t just take our word for it—Liberty Home Guard Reviews speak for themselves!
Oscar was very thorough and competent. He arrived on time and finished the electrical work quickly. He was very friendly and answe...
Mimi C.

I did some research before I looked for a Home Warranty Company and I also looked at the BBB ratings before I made my decision. Li...
Sally W.
I am impressed with the service I received from Keith Gordon. He explained extensively and clearly what in included in the warrant...
Exie R.
Daniel in Customer service was very helpful in setting up a service call. I appreciate the prompt effort.
Frank A.

same day responsive to claim. technician assigned very quickly. also follow up after completion!
Vince A.
Rocky Phillips was very nice and helpful amazing person, very patient, and very good to work with. Overall amazing &nbs...
Seven S.
I've been with Liberty for three years now and very pleased on how they process claims and pay on time. Looking forward to working...
Rathin S.
This is review is for Kato Nunez. He was a great in resolving my issue. I really appreciate his patience and excellent customer se...
Mohammad K.
Orlando Peralta provided excellent customer service. He thoroughly explained the status of my claim and what I needed to do. He pr...
JSL
Jay Cruz was great about explaining the contractor onboarding and very helpful with process
Ricky S.


